GoodBarber's Online Help
App Walkthrough Extension
Create an integrated tutorial and guide your users through the first launch of your app.
The Walkthrough is only available on mobile devices (it is not available on iPad).
Install App Walkthrough extension
1. Go to the menu Extensions Store > All Extensions > App Walkthrough extension
2. Click "Install"*
*Depending on your GoodBarber offer it might be a paid extension.
The price is displayed on the extension page.
Back office setup
Once the extension is installed, access its settings from the menu My App > Walkthrough
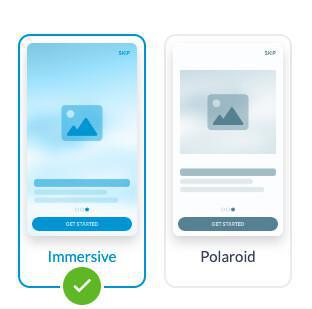
1. Select the template:
Immersive: image is displayed full screen
Polaroid: image is displayed above the step's title

2. Add up to 5 steps:
- Click "Add a step"
- Select your image (recommended size: Immersive:1536*2048 / Polaroid: 1200*1200) and add a title and description
- Add a LottieFiles animation
3. General settings:
Set the elements of your app walkthrough screens
- Skip button
- Page title (common to all steps)
- Effects on the image
- Fonts and colors of the texts
- Pager color
- Next button / Get started button colors
General behavior
1. Navigation between steps
Clicking the "Next" button makes users navigate to the next screen. Users are also able to navigate between screens by scrolling horizontally.
2. Buttons name
In all steps, the title of the button is "Next", except the last one which is "Get started".
If there is only one screen, the button’s title will be “Get started”
3. Pager
The pager is updated every time users go to another step. If there is only one step, the pager is not displayed.
4. Walkthrough = Onboarding
The Walkthrough is an onboarding pattern. It is displayed only the first time a user opens the app after installing it.
On PWA, the Walkthrough is only displayed on the browser version (not on the standalone version )
5. Popups & Notification
Consent popups (Cookies or Funding Choices) are displayed before the Walkthrough
Other notifications (SMS, allow push, allow location, install prompt) are displayed after the Walkthrough
 Design