GoodBarber's Online Help
"Kontact" Beacons
The Kontact brand and its application
As soon as you receive your Kontact order, the group of beacons received will already be programmed with the same UUID, and different Major/Minor parameters. However, these are default UUID and Major/Minor settings.
We suggest that you modify this value, taking into account the format given before. Attention, usually the UUID must be identical for all of the beacons owned by the same person/business. Therefore, you will be able to enter just one unique UUID in your back office. So, be careful to give the same UUID to all of your beacons.
Then download the Kontact application onto your phone or tablet :
- Apple Store (iPhone / iPad) : https://apps.apple.com/pl/app/kontakt-io-administration/id1067320511
- Play Store (phones and Android tablets) : https://play.google.com/store/apps/details?id=io.kontakt.app
The following screenshots show the application on the iPhone, however, the procedure to follow is exactly the same for an Android.
Before anything, remember to activate the bluetooth on your device.
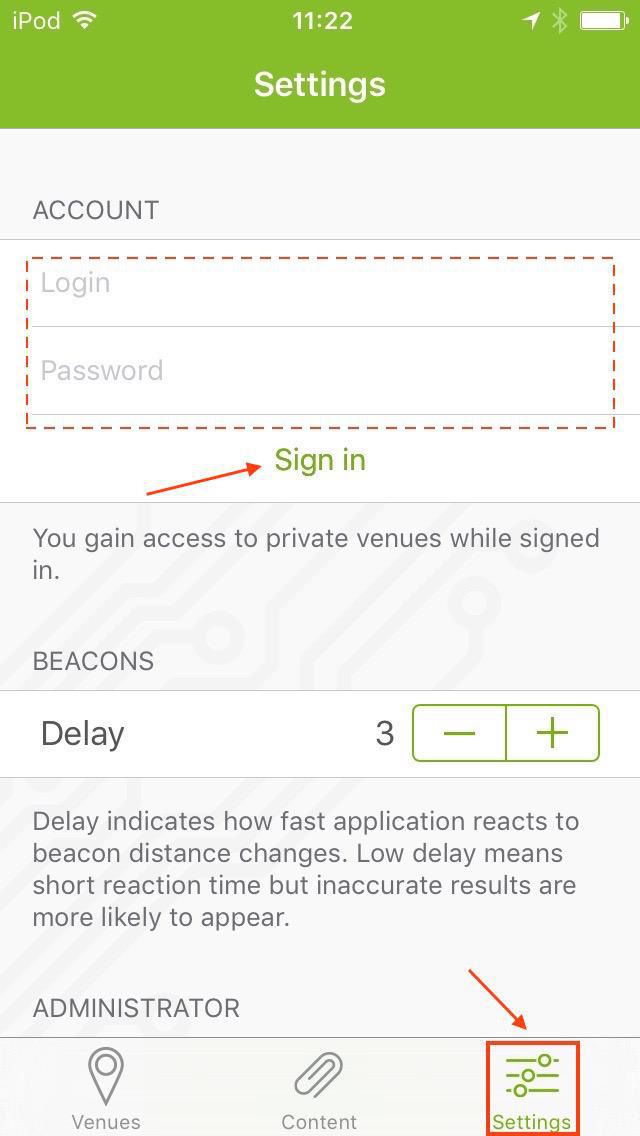
Open the application, then click the last tab at the bottom right "Settings", as indicated in the screenshot below.
You will have to enter your credentials (sent to you in an email from Kontakt) in the spaces outlined in the dotted lines, then click "Sign in".
Enter into administrator mode
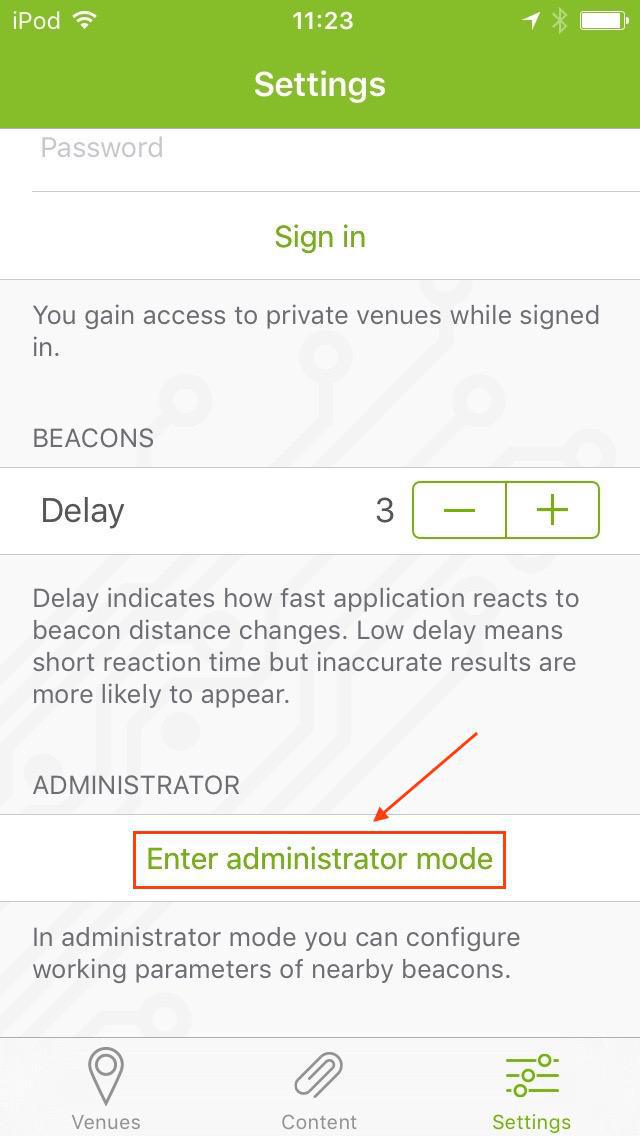
Then click "Enter administrator mode".
Access the list of beacons
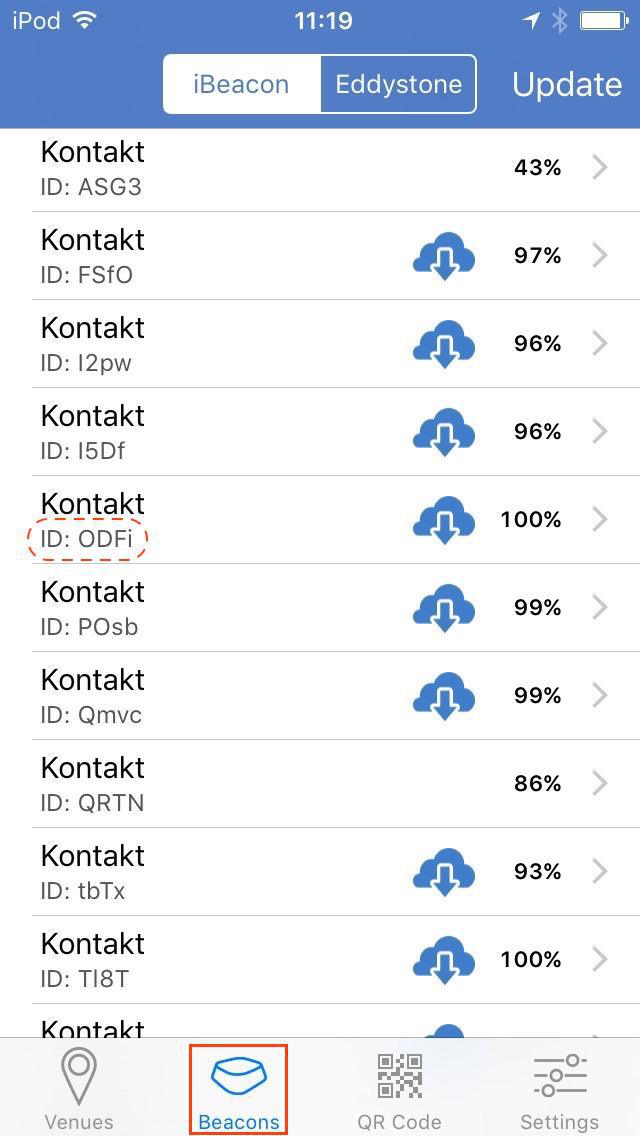
You may notice a change in how your tabs are situated at the bottom of the screen. The new "Beacons" tab allows you to view, in list form, all of the beacons that your phone/tablet is able to detect. The "Eddystone" tab does not contain any relevant information for us, so stay in the "iBeacon" tab.
Getting the UUID, major and minor
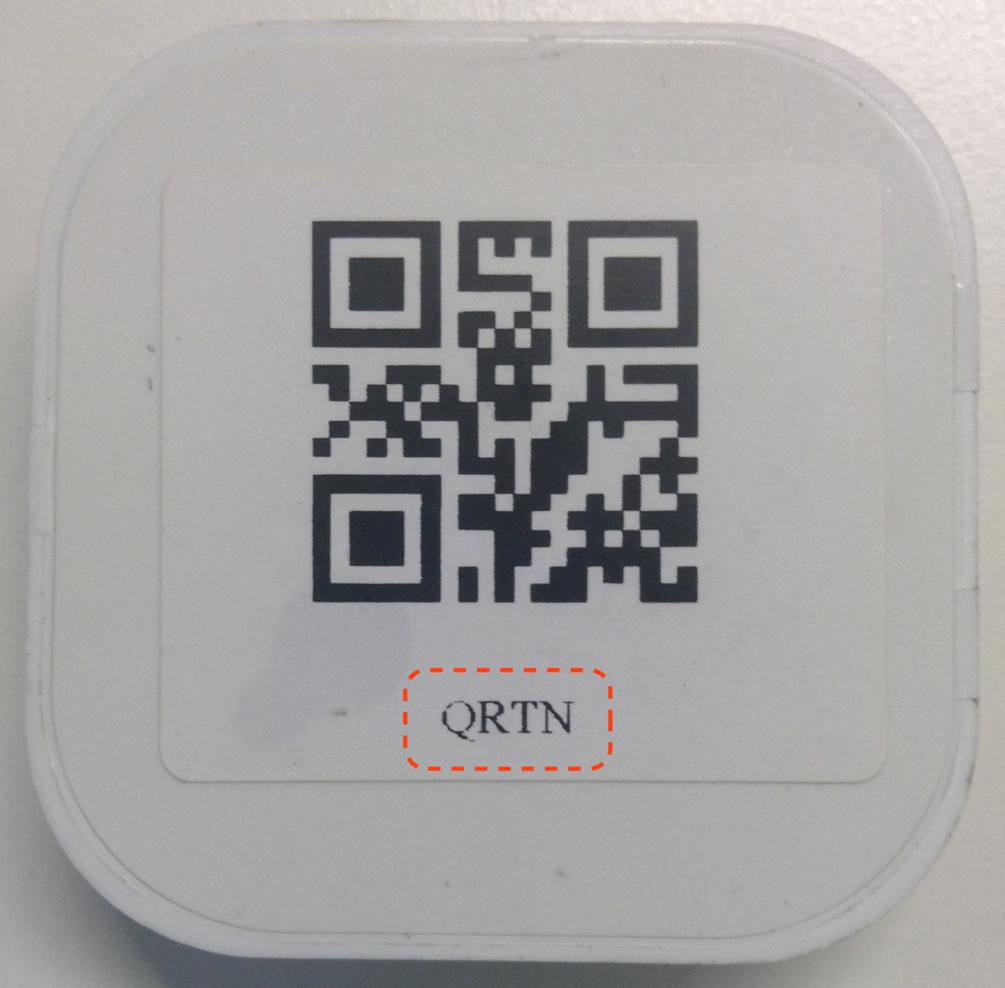
Now we can go to the configuration step. As in the previous screenshot, each beacon in the list can be identified with an ID : this is present on the back of your beacon. Click on the concerned one.
Tip : You can also click on the third tab, "QR Code", and scan the code seen on the back of your beacon in order to have immediate access to the detailed file.
Whichever method you use, you will arrive to a page like this one :
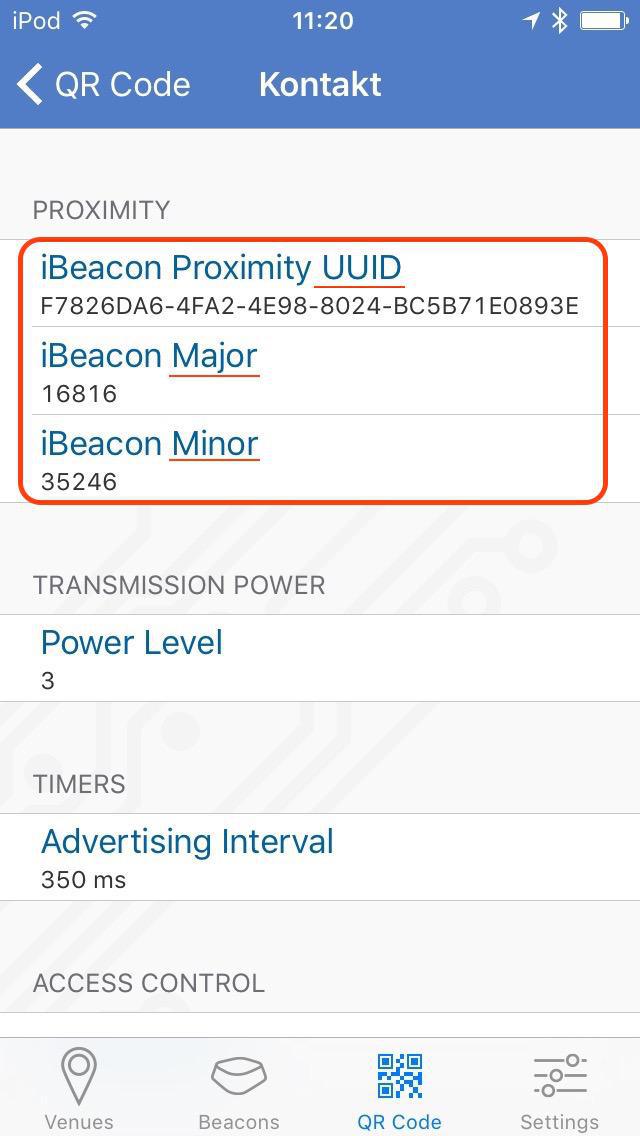
Here you will also find information that will be useful when creating your push notification, namely:
- UUID
-Major ;
-Minor.
/!\ You will need this information to create the beacon your push notification will rely on.
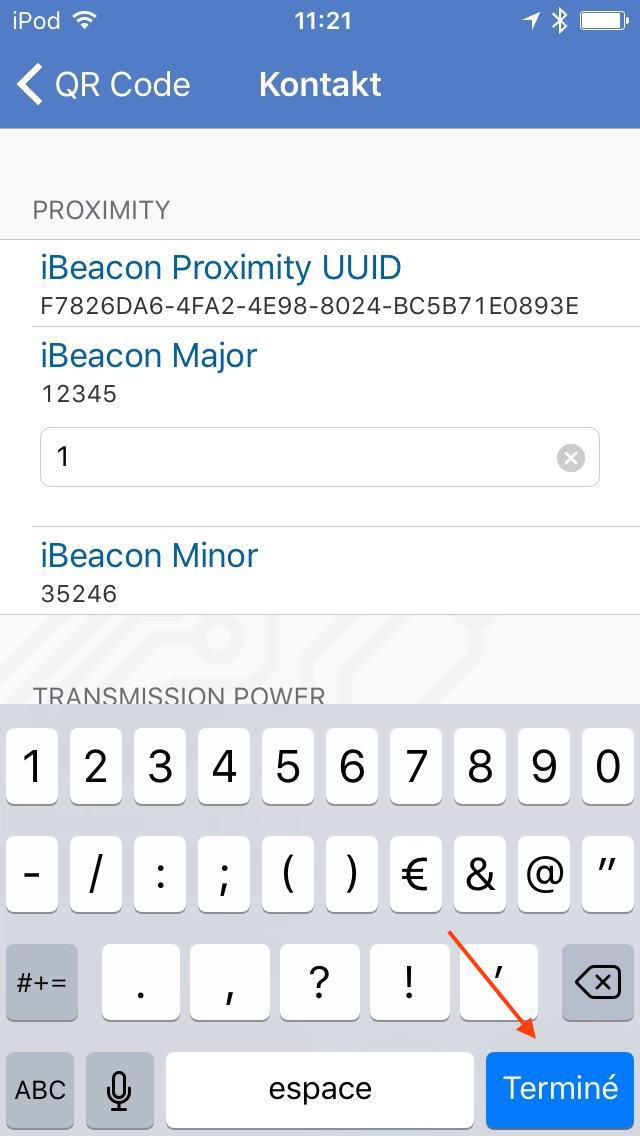
If you want to modify the default values, you will have to :
- Click on the concerned field, whether it be major or minor ;
- Enter a new value ;
- Click on "Done".
[OPTIONAL] Extra configuration
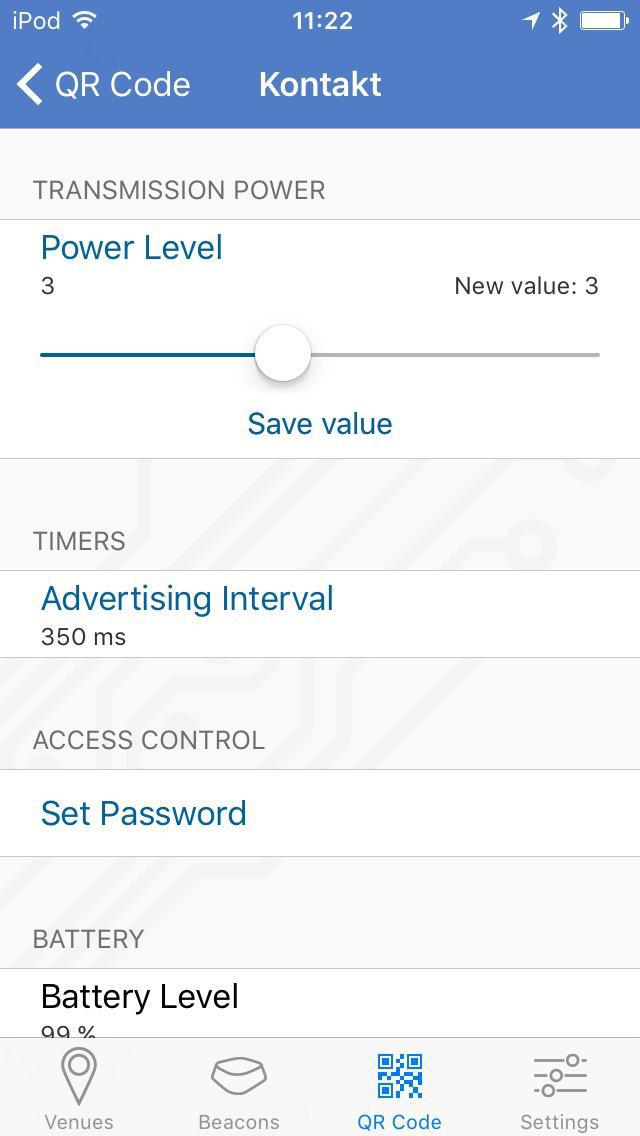
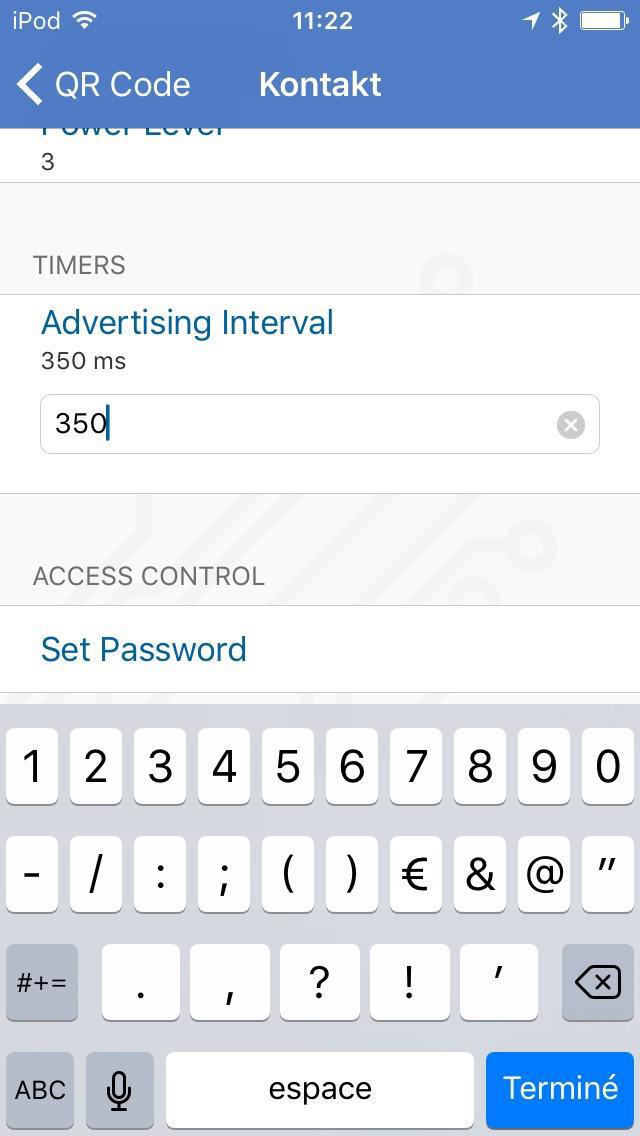
/!\ Modification of the following settings affects the energy consumption and therefore the battery life
You also have two options for adjusting the configuration based on your needs :
- Setting the transmission power : the value of the "Power Level" section is programmed to 3 by default, but you can increase it. Such a modification is useful if your beacon is situated in the middle of a crowded space, with obstacles, or just if you want to be sure that your beacon emits as much as it can. On the other hand, according to the usage of your beacon, it can be wise to turn down this setting in order to save battery ;
- Setting the "Advertising Interval" : this is the frequency at which the beacon signal is emitted. Like in the previous case about the emission power, it's up to you to decide how useful such a modification is according to the usage conditions of your application and the placement of beacons in the environment.
Create a notification based on a beacon with GoodBarber
1. Activate the "Beacon" extension
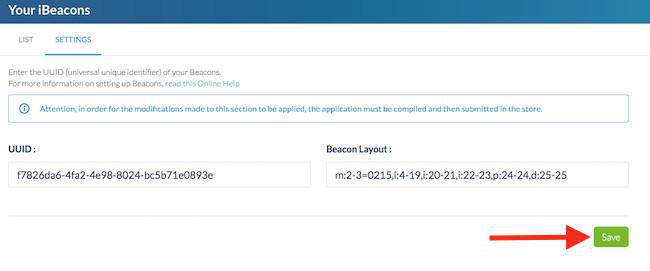
2. Fill in the UUID field for the beacons you own, by going in your back office, in the menu Notifications > Geoalert, click on iBeacons as shown below.
The beacon layout is a fixed value, defined according to the brand of your beacons, in the case of the Kontakt beacons it will always be : ""m:2-3=0215,i:4-19,i:20-21,i:22-23,p:24-24,d:25-25".
3. Click "Save".
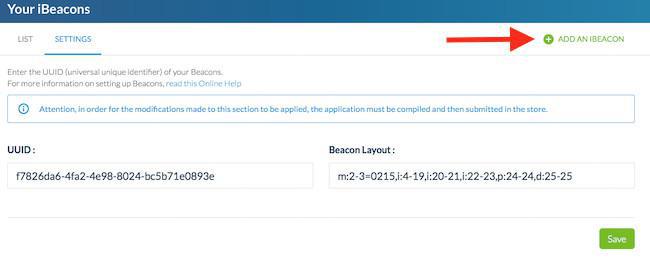
4. Click on add an iBeacon.
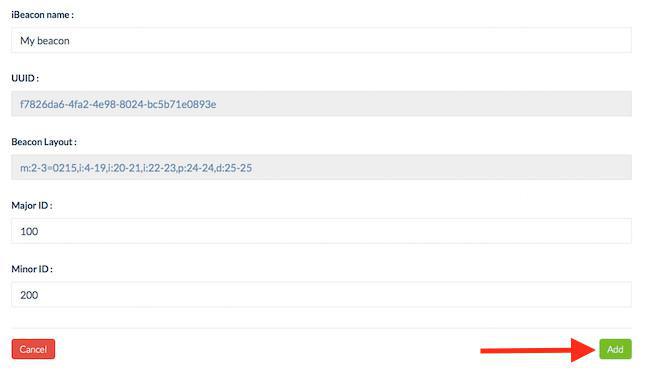
5. Create a beacon by indicating its major and its minor.
6. Click on Add: your beacon is now ready.
 Design