GoodBarber's Online Help
Facebook Authentication - 2/2 | Set up the login with Facebook | Progressive Web App
To enable the Facebook login, you must declare your app to Facebook.
Create a developer account on Facebook: How to register as a developer on Facebook
If you do not follow the full procedure, you will not be able to connect your App to Facebook.
In the explanation of the process, we will use an example. Make sure you fill in the correct information for YOUR app.
Create an app
1. Go to this URL: https://developers.facebook.com/apps
2. Click "Create App".
3. Select "Consumer" in the popup
4. Click "Continue"

5. Fill in the fields in the popup:
- "App Display Name": Fill in the name of your application
- "App Contact Email": Add your email
6. Click "Create App"
Add a product
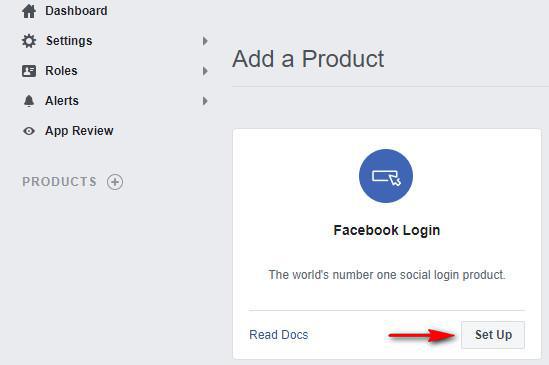
1/ Click "Set up" in the Facebook Login box
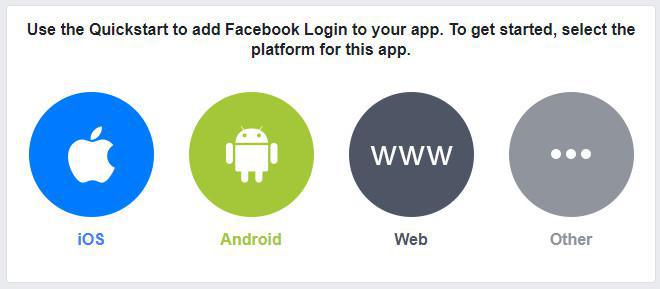
Select the platform "Web"
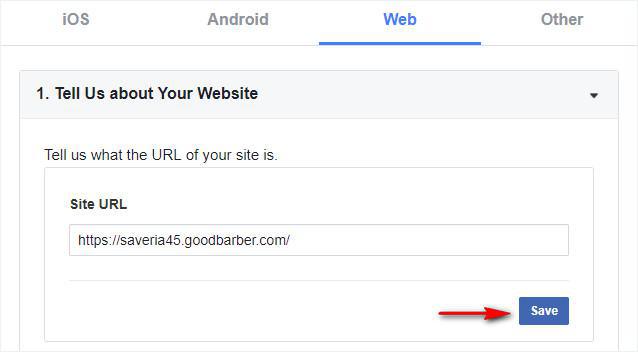
Client OAuth Settings
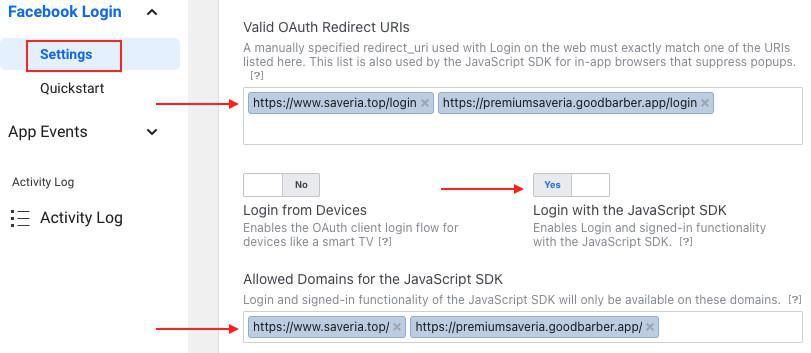
1. Go to the menu Facebook Login > Settings
2. Fill in the field Valid OAuth Redirect URIs with your PWA url followed by /login
For instance: https://myapp.goodbarber.app/login
If you set a domain name, make sure to add both: default url + custom url (with your domain name) followed by /login
3. Toggle the "Login with the JavaScript SDK" option to Yes
4. Fill in the field Allowed Domains for the JavaScript SDK with the url of your PWA.
For instance: https://myapp.goodbarber.app/
If you set a domain name, make sure to add both: default url + custom url (with your domain name)
5. Click "Save changes" at the bottom of the page.
See example below:
Go to Settings > Basic in the left column
1. Add your Privacy Policy URL
You can download a standard privacy policy for your app, from this link
This is a template privacy policy. You are invited to customize it.
In your back office, go to Settings > Other settings > My Files, create a folder called Privacy Policy and upload your file in .pdf format.
Open the file in an external browser to display its full url. Copy it and paste it on Facebook platform.
2. In the field User Data Deletion, select Data Deletion Instructions URL and fill in your URL:
To be compliant with General Data Protection Regulation (GDPR), you must provide a URL with explicit instructions to inform people how to delete their data from your app.
3. Choose a category from the drop down menu
4. Click "Save changes" at the bottom of the page
Go to Settings > Advanced tab in the left column
1. Enable the option "Native or desktop app?"
2. Click "Save changes" at the bottom of the page

Make your Facebook App public

2. Click "Switch mode" in the popup.

Copy your App ID on Facebook platform
1. Retrieve it at the top of the page

Paste this value into your GoodBarber back office
1. Go to the menu Settings > Registration settings > Registration process to authorize your users to sign up in your PWA.

2. Under External Services, switch Authorize Facebook connection to On
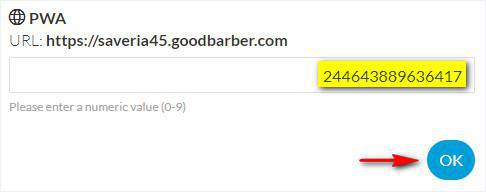
3. Paste your Facebook App ID in the corresponding field
4. Click OK
Request Advanced Access for public_profile permission
1. Go to the menu App review > Permissions and features on Facebook platform
2. Click "Get advanced access" for the permission public_profile
3. Confirm Advanced Access for public_profile (don't forget to check the box "I agree that any data I receive through public_profile will be used in accordance with the allowed usage.")
4. Re-enter your Facebook password to submit the confirmation
5. Make sure you have an advanced access for the permission public_profile in the list as shown below:

Complete Data Use Checkup
If Facebook asks you to complete Data Use Checkup:
1. Click "Start checkup"
2. Check the box "I certify that any use of public_profile is in compliance with the allowed usage."
3. Click "Continue"
4. Check the box to certify Compliance with Platform Terms and Developer Policies and click "Continue"
5. Click "Submit"
Regenerate your PWA
Rebuild your PWA so you can test the Facebook authentication:
The different types of Progressive Web App updates
This feature does not work on the back office preview. The only way to test the Facebook authentication on your app is on the newly generated PWA.
- Authentication extension
- User Groups extension
- Add a checkbox to accept the terms of the app before signing up
- Export or import a list of users
- Facebook Authentication - 1/2 | Register as a Facebook developer
- Facebook Authentication - 2/2 | Set up the login with Facebook | Native apps
- Facebook Authentication - 2/2 | Set up the login with Facebook | Progressive Web App
- Migration of GoodBarber apps to Android 11 - Facebook authentication
- X (Twitter) Authentication | Set up the login with X (Twitter)
- Sign in with Apple Authentication (Premium plan only)
- Create a Test User Account (Required to publish on the stores)
- Change the Login Placeholder Color (PWA only)
 Design