GoodBarber's Online Help
Authentication extension
Activate the Authentication extension
1. Go to the menu to Extensions Store > All Extensions
2. Scroll to the Authentication extension or search for it in the search bar
3. Install it from the Extensions store by clicking on the "Install" green button.

"Login Box" and "Profile" section
After activating the Authentication extensinon, two new sections are added in your section list. They are accessible from the left menu Design & Structure > Structure > Sections : the Login Box and the Profile.
The "Login Box"* is what your users see when they sign up/sign in to the application.
Personalize it with the 3 different design templates offered.
*The "Login Box" section cannot be moved in the list of section. It will always be at the top of the list. This has no impact on the overall menu of the app because it is not actually a real page, but more of a step before accessing content.
Note: the Profile section displayed in the back office preview is not yours, it's just a standard model.
Personalize the Profile section
1. Click on the left menu Structure and Design > Design > Sections Design .
2. Click on the section "Profile".
- "Banner Profile Photo": Choose whether or not to display the profile image in the background of the profile section.
- Edit the fonts and colors of your profile section.
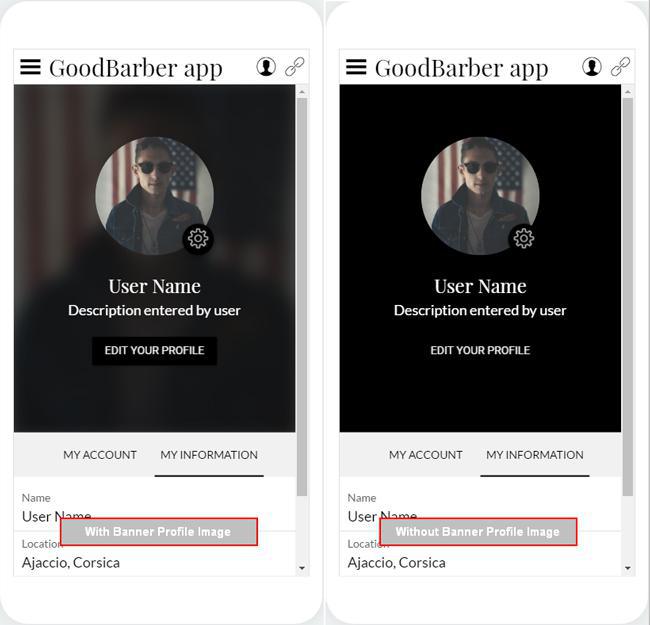
Access to Profile Section
Give access to this section on your app:
- Create a link to this section from your home section .
- Create a link to this section from the navigation menu of your app.
- Add an action button from the header of your app.
User management
In the left menu Community, you have access to 2 sub-menus:
1/ User List :
Here you will find the list of users who have signed up. This list gives you some information about your users.
- Modify user information by clicking on their name
- Add a user directly from the back office by using the button provided for this purpose
2/ Public/Private :
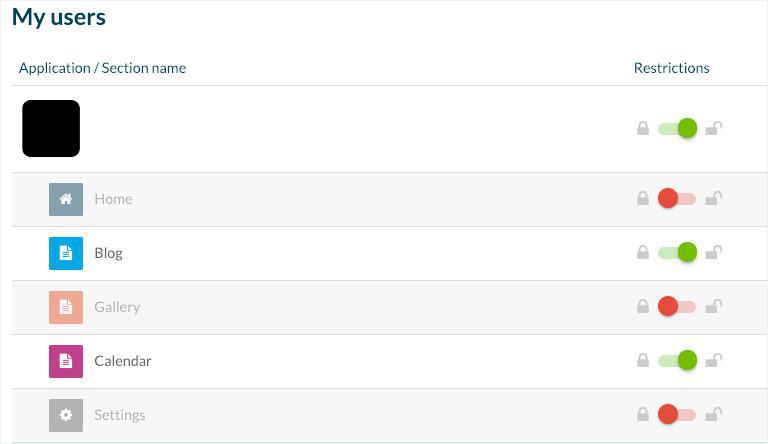
Decide if your users must sign in to access the entirety of the app, or only to access specific sections.
The status is indicated by the red "Private" button or green "Public" button.
By default, the entirety of the app is private.
Import your own user list
We offer the possibility to import a list of users to your app into a CSV file.
For more details, please check online help "Exporting or importing a list of users ".
Access the Settings
You can access the Settings of your user's profiles on the menu Settings > Registration Settings > Profile Settings .
This menu has 3 different tabs.
A) Connection/subscription Tab:
Sign Up
- Authorize users to sign up in the app:
Place the button in the OFF mode: only users that are already in the user list can access content restricted by login.
This can be useful if your app is intended exclusively for internal usage.
- Allow access to your app without having signed up
Place the button in ON mode: users will have the option to skip the sign up/sign in and directly access the app or the section restricted by the login.
- Force email validation at registration (double opt-in)
Place the button in ON mode: adds an additional step to the email subscription opt-in process, requiring a user to verify their email address and confirm interest.
An email is sent out to the user which includes a link to click and confirm the registration. Only after the confirmation click is completed will the user officially be able to login to your app.
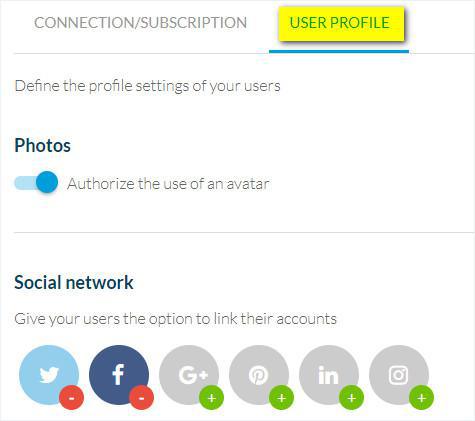
B) User profile Tab:
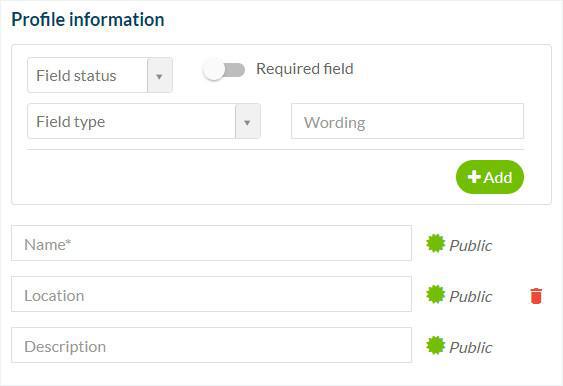
Set up the information requested in the user profile.
Authorize the addition of an avatar or not, permit users to include several of their social network accounts.
C) External Services
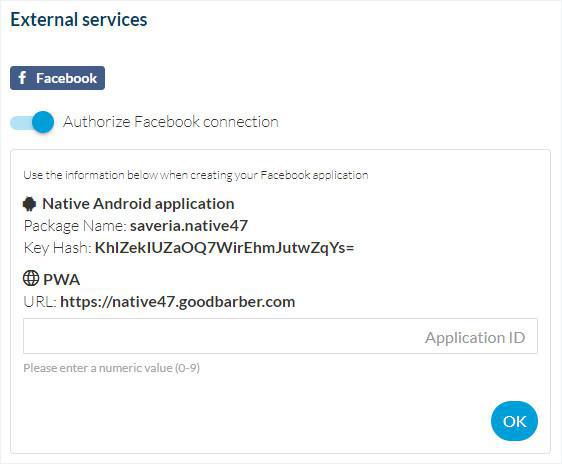
Activate the possibility for the user to sign into the app with their Facebook or X (Twitter) profile.
To do this, you will have to set up each service as detailed in the specific online helps .
If you have already followed the procedures to configure Facebook and X (Twitter), the information should already appear in each section, and you will not have to redo this process.
When the user signs in via Facebook or X (Twitter), their profile photo, name, location, and number of friends/followers will automatically be retrieved.
Display the push notification history or not on their profile (native offers only).

Add supplemental information fields:
1. Choose the type of field
2. Choose the title
3. Click "+ Add"
4. Save your changes.
These settings will display the same way as in :
-The Profile section of the user in the application
-The List menu as soon as you modify information of an existing user
-The List menu as soon as you add a new user
Video tutorial
Note: Menus have changed in the back office, but the behavior explained in the video is still accurate.
- Authentication extension
- User Groups extension
- Add a checkbox to accept the terms of the app before signing up
- Export or import a list of users
- Facebook Authentication - 1/2 | Register as a Facebook developer
- Facebook Authentication - 2/2 | Set up the login with Facebook | Native apps
- Facebook Authentication - 2/2 | Set up the login with Facebook | Progressive Web App
- Migration of GoodBarber apps to Android 11 - Facebook authentication
- X (Twitter) Authentication | Set up the login with X (Twitter)
- Sign in with Apple Authentication (Premium plan only)
- Create a Test User Account (Required to publish on the stores)
- Change the Login Placeholder Color (PWA only)
 Design